Showing posts with label sous vide. Show all posts

Sunday, June 29, 2014

Xan: Sous-vide pork tenderloin

All things considered, pork tenderloin is not my favorite cut.  I'm just not on board with the emphasis on tenderness over flavor.  If I have to choose between them, I will take flavor any day.

Technically, now that I have my immersion circulator, I don't have to choose between them.  I can take tough, flavorful cuts and make them tender, with a longer cook.  Even so, I'm not going to completely stop eating the naturally tender cuts.

Cooking sous-vide for a short time (1-4 hours) has its own advantages.  Over this short time, the meat truly loses almost no moisture, ending up noticeably juicier than meat cooked either the conventional way or over an extended stay in the water bath.

Here is pork tenderloin cooked at 138 F for 3 hours:

Pink and juicy.
And if anyone is wondering about the safety of cooking pork to 138 degrees: The idea is that bacteria die much quicker at higher temperatures, but by holding the meat at 138 for long enough, the same number of bacteria are killed. This pork has been completely pasteurized, which sous-vide allows me to do at a lower temperature than other cooking methods allow.

So not only is the meat cooked evenly from edge to edge, but it can also be safely cooked to a lower temperature throughout, if desired.  We could go down even further from here, although at this point the binding constraint has nothing to do with science.  I must always ask myself: Will Catherine eat it?

Anyway, this is easily the best pork tenderloin I've made.


Unless it was this one a few days before:

Yo dawg, I herd you like two-packs, so I put a two-pack in your two-pack so you can eat while you eat...

I'm not sure, but I had two chances to experiment because Costco sells pork tenderloin in two packs.  I gave half of my two-pack to Ryan, but it turns out each half of the two pack is also a two-pack, because Costco is the eternal trailblazer of embiggening.

I served one of these with squash soup:


Really excellent, but that's for another post. (Forthcoming!)


Tuesday, June 24, 2014

Xan: Sous-vide leg of lamb for Easter!

As usual, we had leg of lamb for Easter!  I was really excited to sous-vide it, because leg of lamb is a cut with wide swaths of fairly lean meat, yet also a decent amount of connective tissue.  So I hypothesized that it would really benefit from an extended stay in the water bath.  I did 24 hours at 137 degrees F, but next time I might even go down to 12 as it did not need that much tenderizing.

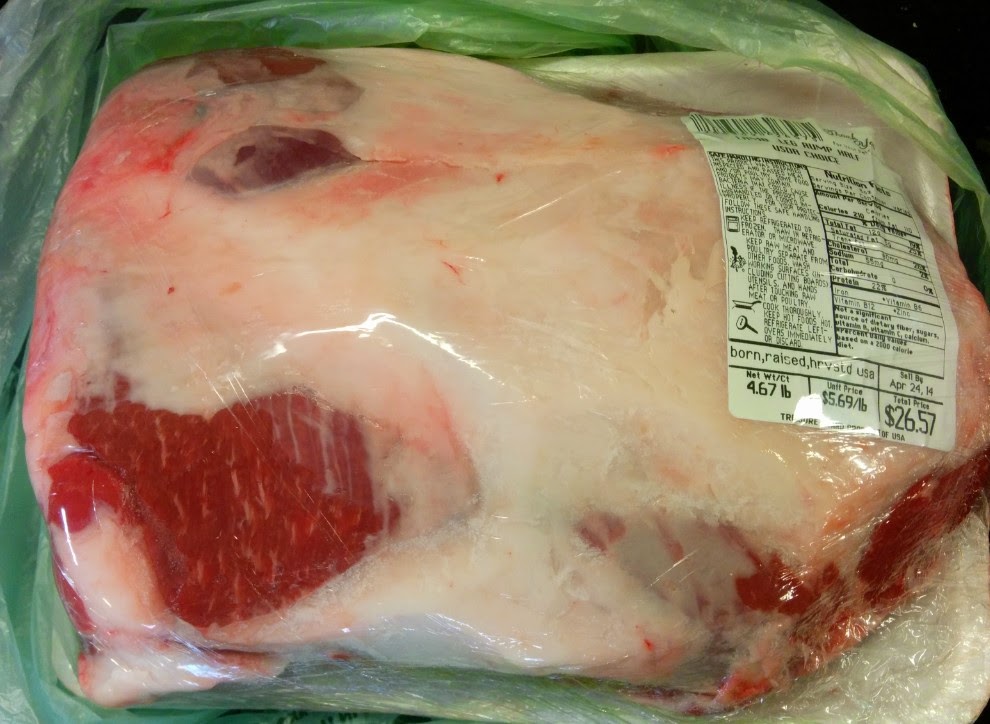
Before we get to the cooking, though, I want to say a quick word about how I trim meat. Look at this leg:


There's a pretty thick fat cap. People tend to either take it all off or leave it all on, but I think that's missing a great opportunity. My goal is to take most of it off, leaving just a thin layer of fat:


It doesn't require super butcher skills. It doesn't have to be pretty. Just make it look something like that, and don't worry, it will be beautiful after it cooks.


Ode to crispy fat. 
Shall I compare thee to a simmer's bay leaf?

No, because that would be silly.  But I will tell you why you should bother to follow my trimming instructions.

You should bother because there's nothing so delicious as browned, crispy fat, and only the outermost surface of the fat will ever get crispy.  Non-crispy fat can be good too, although frankly it doesn't hold a candle to crispy fat, and if you leave a lot of fat on, most Americans will simply cut it all off anyway.  But everyone loves a thin layer of crispy fat.

I mean, that's basically what bacon is.  That's the reason everyone loves bacon, even though it is 50% fat, even though they trim the fat off their steak without a second thought.

Nevertheless, you could conceivably go your whole life without explicitly noticing that crispy fat is the component producing max deliciousness.  So I'm here to beat you over the head with this obvious-in-retrospect fact.  It's easy to verify.  The next time you are trimming your steak at the table, try cutting off the very outer edge of the fat and eating it.  You won't be disappointed.

And, by the way, I think you should mostly ignore recipes that tell you to leave a big fat cap so the meat will be basted while it roasts in the oven.  Basting action can serve a purpose (effectively frying the outside of the roast), but a little goes a long way, and fat takes a long time to render. After the roast is done, you will probably be left with a thick layer of all the unrendered fat that did not baste your meat, so what was the point of it?  If you happen to be surrounded by people who like to eat that stuff, then by all means, leave it on.  Otherwise, you can get 95% of the flavor boost with 5% of the waistline boost by trimming most of it away.


Results.
Anyway, so I bagged the lamb with olive oil, garlic, and thyme:


After cooking, the lamb was quickly seared, to produce this:


I served it with carrots and asparagus, and Israeli couscous which I combined with my egg-lemon soup recipe, which turned out to be a really good idea:


As you can see, the meat is perfectly pink.  There is no visible fat, only a thin crispy layer working its invisible magic on the look and taste of the final product.


To Victory!
And now I would like to make a very special announcement: Victory!  As we know, lamb is an acquired taste, and one that most Americans have not acquired.  Less than one pound of lamb is consumed for every 100 pounds of chicken in the US.  And there was a time when Catherine too did not like lamb. She would eat it, but only begrudgingly.  I have worked hard to change that, because lamb is one of my very favorite meats.

Recent months have seen considerable progress.  First, she started to complain when I would cook lamb for myself and chicken for her.  Then I started to get actual positive reactions.  And with this dish, I got a genuine rave review!

Wolf me down, and your journey towards the lamb side will be complete! 

Furthermore, I have since replicated my results with a lamb shoulder roast (forthcoming), so it wasn't just a fluke.  It's safe to say that Catherine now loves lamb, just like me and many of my fellow Vongsas.  Huzzah!  It's only fitting, now that she's a Vongsa too :)

Monday, June 23, 2014

Xan: Sous-vide short ribs!

72-hour sous-vide short ribs at 144 degrees, and sous vide eggs:


As you can see, at 144 they are still fairly pink, and because of the long cooking time they were hard to get out of the bag without falling apart.  They were pretty good, although next time I think I will go down to 135 degrees for 72 hours.

I don't have a gratuitous shot of breaking those egg yolks, so here's one from a similar adventure a couple weeks later:

That would be Ryan's hand...


Didn't I tell you before that I just serve everything inside a spaghetti squash now?  Apparently I was actually being serious.

Saturday, June 21, 2014

Xan: Sous-vide beef chuck!

Kris and Cammy got us an Anova immersion circulator off our wedding registry. You Vongsafooders probably know that already, because I have been going on about it for 2 months now.  I know, I know, that's a lot of talk and no pictures for a guy who has a food blog. But don't worry, your patience will be rewarded.  Today!

Background

Sorry, but I have to give some background on sous-vide at least once.  If you just want to see the results, scroll down to the next section.

To quote from wikipedia,
Sous-vide (/suːˈviːd/; French for "under vacuum") is a method of cooking food sealed in airtight plastic bags in a water bath...for longer than normal cooking times—72 hours in some cases—at an accurately regulated temperature much lower than normally used for cooking.
Much like the internet, meat is basically a series of tubes, except full of water instead of the NSA. And when you heat it to a given temperature, the tubes contract, squeezing out water that will never come back.  (Unfortunately, the internet doesn't quite work that way).

Ordinary cooking methods produce a gradient of doneness. By the time the center is cooked to the desired temperature of, say, 130 degrees, the outer layers of meat are overcooked. Sous-vide cooking gets around this by cooking the meat in a water bath at the exact temperature you wish your meat to end up.  As a result, it can never overcook and stays pink from edge to edge.

Furthermore, consider a tough cut like beef chuck.  Normally, you would cook it at a higher temperature (say 190 degrees) to break down all the tough connective tissue.  Unfortunately, the tubes still contract and you are left with dry, gray meat.  Of course, chuck is full of fat so it's still delicious.  But what if you could have the best of both worlds?

It turns out that connective tissue will break down at lower temperatures, but much more slowly. Enter sous-vide. By holding the water bath at 135 degrees for 24-72 hours, the chuck becomes tender while remaining pink and juicy.  (Photographic proof below!)

Because I love meat, I've been excited about sous-vide cooking for a while now. I did some experimenting back in January 2011, but I certainly wasn't going to cough up $500 for a large countertop appliance, plus another $150 for a large vacuum sealer gadget.

A few years later, immersion circulators are just starting to become affordable for home cooks. They are smaller (you just attach them to any pot), much cheaper, and actually outperform the countertop appliances anyway.  And I discovered Ziploc vacuum bags that you pump the air out of with a small, $5 plastic vacuum pump.  What's not to love?  It was clearly time to jump aboard.


Great, let's get to the meat of it!

The very first thing I cooked was beef chuck, and it was amazing.

I sealed the meat in a vacuum ziploc and pumped out the air.  Then I put it in a water bath at 135 degrees F:


24 hours later, this emerged:


It's nothing special to look at yet.  All the magic is on the inside. Since meat doesn't really brown at 135 degrees, next we give it a quick sear on all sides:


After a couple minutes...


...the meat is transformed into this:


Now let's cut into it and see what we have:


Yep. As promised, it is pink from edge to edge.  This is beef chuck with the consistency of a good steak, and more flavor to boot.  Dinner is served!


The texture can be adjusted by varying the cooking time.  To produce a more falling-apart texture, we could increase the time to 48 (or even 72) hours.  But we really like the 24-hour chuck and have cooked it several times now.

More to come!

Saturday, December 10, 2011

Xan, Catherine, Brendan: Mango sushi and chicken teriyaki!

Continuing to work my way through the Great Backlog. Our friend Brendan came to visit us, oh let's see, that was...almost four months ago.  I'm really behind, shut up.  Anyway, other than seeing Patrick Stewart and LeVar Burton at a blues bar, the coolest thing we did was probably this cucumber, avocado and mango sushi. Behold the genius of Brendan B!


By the way, how does everyone like the new Vongsafood logo?
We used these bamboo place mats to roll up the sushi:


I used to really complain about these mats because while they looked nice, they failed utterly at the other half of their job, namely keeping crumbs and other foodstuffs off the table.  But now they only fail utterly at a third of their job, and I have accordingly reduced my complaining by 33%.

Now, let's have a little etymology lesson.  Normally we avoid pretension on Vongsafood, but a little vocab can go a long way toward confusing people into thinking you're a good cook.  Here's the sushi chef, or sous chef as they're called in Japan, together with his, umm, cucumber slicer person:


Now, you might think that sous comes from the Japanese word for sushi, but it is actually derived from the English word souse.  As you know, souse means to get wet, which is exactly how you make the nori (seaweed) stick to itself.  It seems odd, but according to my research souse made its way into the Japanese vernacular way back in the Edo Period of the early 1800s, coinciding with the introduction and subsequent popularity of such American woodblock prints as The Great Souse.  For whatever reason, the word stuck, and to this day it means to submerge in Japan.

[By the way, did you know that nori is a good source of iron?  I mention this because the digestive process by which the body extracts the iron is quite fascinating.  After you swallow a sheet of nori, the stomach literally flips the nori around until it turns into iron.  It may seem weird at first, but it actually makes a lot of sense if you think through the process in a backwards sort of way.]

Under the supervision of the master chef, I did a little sousing myself:

The bowl at the bottom contains the sousing liquid.
You can tell those are my hands because they are spindly.  

Besides the sousing, I also filled the role of sous vide chef, which is Japanese for "submerged cooking."  This is how the Japanese make their world famous Chicken of the Sea teriyaki.  I've posted about sous vide before, but this time I got a really good picture of my makeshift rice cooker sous vide setup:


As you can see, the chicken breasts have been placed in Ziploc bags with the air removed.  This is an important part of the method too, but unfortunately the Japanese don't have a word for "under vacuum," so if we wanted to include it in the name, we would probably have to borrow words from some other more pretentious language.  Nobody wants that, so this style of cooking is commonly referred to simply as sous vide.

Confused? Remember, that means I am a good cook.

Anyway, the nice thing about this method for something like chicken teriyaki is that it has to marinate for a while anyway, so why not let it do that as it's slowly coming up to temperature over the couple hours it takes to cook?  It seems to work.  Results:

Juicy and delicious!

So, that was yummy.

Monday, January 24, 2011

Xan: Sous-vide chicken breasts and carrot flowers!

I've experimented a few times with cooking sous-vide in my rice cooker.  So far it has worked out pretty well!


For those of you who don't know, the sous vide idea is to cook food in a water bath at the temperature you'd like it to end up.  This confers several advantages.  First, uniformity: normally, to kill all the bacteria, you need to cook the chicken breast to what, 165 in the very center?  By the time the center gets there, the rest of the chicken is much hotter and therefore dried out.  ick.  Secondly, at 165 even the center is dried out.  I think I used to assume this was just an inevitable property of chicken breasts, but there's another way, really!  Because, if you hold it at 140 for a long enough period of time, the same amount of bacteria will die as if you raise it to 165 for an instant.  And since the water bath will hold the chicken at 140 indefinitely, it can deliver a chicken breast that is both juicy and safe.

It takes a couple hours though.  So you need something that's going to be able to hold a temperature for a while.  This stuff is juuuuuust starting to get popular in home cooking, by which I mean there are currently sous vide machines you can buy for like $500, yee$h.  I predict you'll be able to get one for under $75 within 10 years, and that's being generous.  Pretty much all the machine has to do is monitor the temperature of the water and turn the heat on and off to hold it there...this is not rocket science.

In the meantime though, I found that on the Warm setting with the lid cracked, my rice cooker will hold a temperature of about 150 F.  And by propping the lid open the right amount with a wooden spoon, I can adjust it so that it sits almost indefinitely at, say, 140 degrees (good for chicken breasts).  It takes some fine tuning, of course, but I was actually surprised at how steady I could get it.  I don't know how common this is, sous vide in a rice cooker, but it seemed pretty obvious to me so I'm sure other people are doing it too.  For more dramatic temperature adjustments, turn it up to Cook and it will heat up pretty fast, and dropping in an ice cube will drop it 2 degrees...so it really is quite flexible and functional.

And now, the results:


Well in retrospect I really should have taken a picture of the inside of the chicken...that's really the whole point.  I guess we were too busy eating it, so maybe you can just infer that it was juicy.  The sauce was pretty good, a random blend of stuff-I-happened-to-have-in-my-fridge with stuff-I-happened-to-have-in-my-cabinets.  And lest you think I'm missing something important, the chicken was seared in a skillet after the water bath, you just can't tell because the tomato is covering all the parts that actually touched the pan.  (That said, it could have used more searing).  Oh and also, you may actually be interested in these carrots I just invented.  Technically they're pretty much cooked the same way we cook other orange things on this blog.  But there's a twist, sort of.  I hope you remember your geometry.

Xan's Carrot Flowers (not to be confused with the actual flowers that grow on carrot trees)

  • Preheat oven to 400 F.
  • Peel a bunch of medium carrots (2 per person?)
  • Cut through the fat half of each carrot along two perpendicular planes intersecting the central axis of the carrot. (If the carrots are larger, you may want to make additional cuts, perhaps going farther down the carrot)
  • Line a sheet pan with foil and spread some olive oil down.  Put the carrots on top, "tossing" them to coat with oil.  Salt and pepper the carrots to your liking.
  • Bake for 25 minutes or until the carrots are soft and browned (the tips may get a little blackened...this is okay/delicious!).  You may want to take them out after 15 minutes and turn them; the insides will now open more readily so try to rub some oil in there if you like.
I have to say, this is obviously a very pragmatic recipe designed to deal with the nonuniform shape of the carrot.  Yet my mother responds by offering me her fruit carving kit.  what?