Sunday, June 29, 2014

Xan: Sous-vide pork tenderloin

All things considered, pork tenderloin is not my favorite cut.  I'm just not on board with the emphasis on tenderness over flavor.  If I have to choose between them, I will take flavor any day.

Technically, now that I have my immersion circulator, I don't have to choose between them.  I can take tough, flavorful cuts and make them tender, with a longer cook.  Even so, I'm not going to completely stop eating the naturally tender cuts.

Cooking sous-vide for a short time (1-4 hours) has its own advantages.  Over this short time, the meat truly loses almost no moisture, ending up noticeably juicier than meat cooked either the conventional way or over an extended stay in the water bath.

Here is pork tenderloin cooked at 138 F for 3 hours:

Pink and juicy.
And if anyone is wondering about the safety of cooking pork to 138 degrees: The idea is that bacteria die much quicker at higher temperatures, but by holding the meat at 138 for long enough, the same number of bacteria are killed. This pork has been completely pasteurized, which sous-vide allows me to do at a lower temperature than other cooking methods allow.

So not only is the meat cooked evenly from edge to edge, but it can also be safely cooked to a lower temperature throughout, if desired.  We could go down even further from here, although at this point the binding constraint has nothing to do with science.  I must always ask myself: Will Catherine eat it?

Anyway, this is easily the best pork tenderloin I've made.


Unless it was this one a few days before:

Yo dawg, I herd you like two-packs, so I put a two-pack in your two-pack so you can eat while you eat...

I'm not sure, but I had two chances to experiment because Costco sells pork tenderloin in two packs.  I gave half of my two-pack to Ryan, but it turns out each half of the two pack is also a two-pack, because Costco is the eternal trailblazer of embiggening.

I served one of these with squash soup:


Really excellent, but that's for another post. (Forthcoming!)


Tuesday, June 24, 2014

Xan: Sous-vide leg of lamb for Easter!

As usual, we had leg of lamb for Easter!  I was really excited to sous-vide it, because leg of lamb is a cut with wide swaths of fairly lean meat, yet also a decent amount of connective tissue.  So I hypothesized that it would really benefit from an extended stay in the water bath.  I did 24 hours at 137 degrees F, but next time I might even go down to 12 as it did not need that much tenderizing.

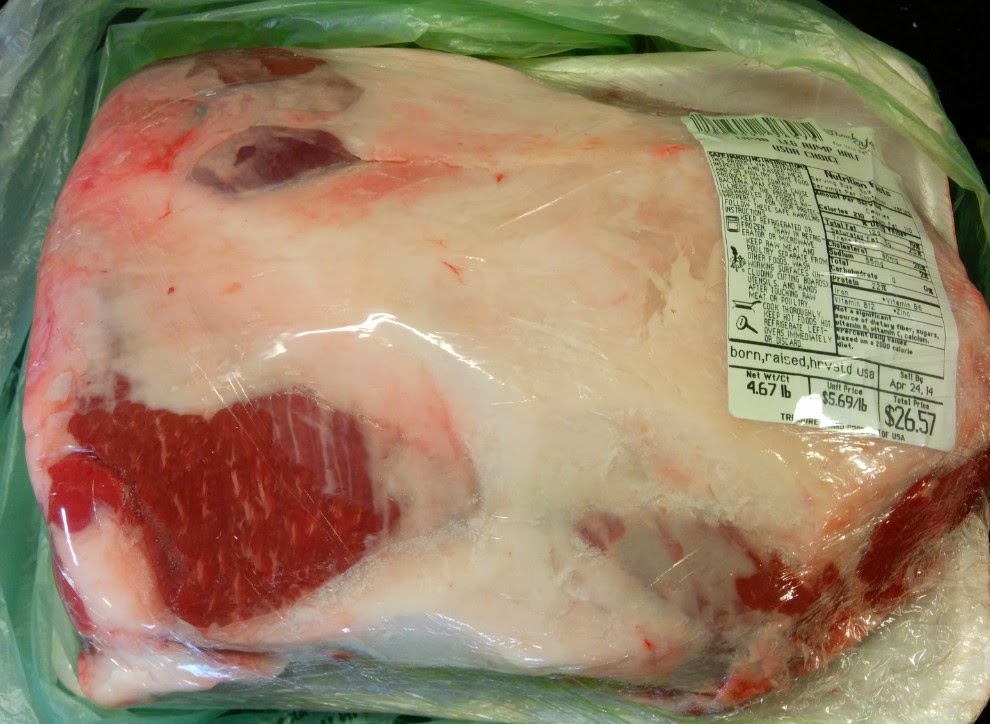
Before we get to the cooking, though, I want to say a quick word about how I trim meat. Look at this leg:


There's a pretty thick fat cap. People tend to either take it all off or leave it all on, but I think that's missing a great opportunity. My goal is to take most of it off, leaving just a thin layer of fat:


It doesn't require super butcher skills. It doesn't have to be pretty. Just make it look something like that, and don't worry, it will be beautiful after it cooks.


Ode to crispy fat. 
Shall I compare thee to a simmer's bay leaf?

No, because that would be silly.  But I will tell you why you should bother to follow my trimming instructions.

You should bother because there's nothing so delicious as browned, crispy fat, and only the outermost surface of the fat will ever get crispy.  Non-crispy fat can be good too, although frankly it doesn't hold a candle to crispy fat, and if you leave a lot of fat on, most Americans will simply cut it all off anyway.  But everyone loves a thin layer of crispy fat.

I mean, that's basically what bacon is.  That's the reason everyone loves bacon, even though it is 50% fat, even though they trim the fat off their steak without a second thought.

Nevertheless, you could conceivably go your whole life without explicitly noticing that crispy fat is the component producing max deliciousness.  So I'm here to beat you over the head with this obvious-in-retrospect fact.  It's easy to verify.  The next time you are trimming your steak at the table, try cutting off the very outer edge of the fat and eating it.  You won't be disappointed.

And, by the way, I think you should mostly ignore recipes that tell you to leave a big fat cap so the meat will be basted while it roasts in the oven.  Basting action can serve a purpose (effectively frying the outside of the roast), but a little goes a long way, and fat takes a long time to render. After the roast is done, you will probably be left with a thick layer of all the unrendered fat that did not baste your meat, so what was the point of it?  If you happen to be surrounded by people who like to eat that stuff, then by all means, leave it on.  Otherwise, you can get 95% of the flavor boost with 5% of the waistline boost by trimming most of it away.


Results.
Anyway, so I bagged the lamb with olive oil, garlic, and thyme:


After cooking, the lamb was quickly seared, to produce this:


I served it with carrots and asparagus, and Israeli couscous which I combined with my egg-lemon soup recipe, which turned out to be a really good idea:


As you can see, the meat is perfectly pink.  There is no visible fat, only a thin crispy layer working its invisible magic on the look and taste of the final product.


To Victory!
And now I would like to make a very special announcement: Victory!  As we know, lamb is an acquired taste, and one that most Americans have not acquired.  Less than one pound of lamb is consumed for every 100 pounds of chicken in the US.  And there was a time when Catherine too did not like lamb. She would eat it, but only begrudgingly.  I have worked hard to change that, because lamb is one of my very favorite meats.

Recent months have seen considerable progress.  First, she started to complain when I would cook lamb for myself and chicken for her.  Then I started to get actual positive reactions.  And with this dish, I got a genuine rave review!

Wolf me down, and your journey towards the lamb side will be complete! 

Furthermore, I have since replicated my results with a lamb shoulder roast (forthcoming), so it wasn't just a fluke.  It's safe to say that Catherine now loves lamb, just like me and many of my fellow Vongsas.  Huzzah!  It's only fitting, now that she's a Vongsa too :)

Monday, June 23, 2014

Xan: Sous-vide short ribs!

72-hour sous-vide short ribs at 144 degrees, and sous vide eggs:


As you can see, at 144 they are still fairly pink, and because of the long cooking time they were hard to get out of the bag without falling apart.  They were pretty good, although next time I think I will go down to 135 degrees for 72 hours.

I don't have a gratuitous shot of breaking those egg yolks, so here's one from a similar adventure a couple weeks later:

That would be Ryan's hand...


Didn't I tell you before that I just serve everything inside a spaghetti squash now?  Apparently I was actually being serious.

Saturday, June 21, 2014

Xan: Sous-vide beef chuck!

Kris and Cammy got us an Anova immersion circulator off our wedding registry. You Vongsafooders probably know that already, because I have been going on about it for 2 months now.  I know, I know, that's a lot of talk and no pictures for a guy who has a food blog. But don't worry, your patience will be rewarded.  Today!

Background

Sorry, but I have to give some background on sous-vide at least once.  If you just want to see the results, scroll down to the next section.

To quote from wikipedia,
Sous-vide (/sˈvd/; French for "under vacuum") is a method of cooking food sealed in airtight plastic bags in a water bath...for longer than normal cooking times—72 hours in some cases—at an accurately regulated temperature much lower than normally used for cooking.
Much like the internet, meat is basically a series of tubes, except full of water instead of the NSA. And when you heat it to a given temperature, the tubes contract, squeezing out water that will never come back.  (Unfortunately, the internet doesn't quite work that way).

Ordinary cooking methods produce a gradient of doneness. By the time the center is cooked to the desired temperature of, say, 130 degrees, the outer layers of meat are overcooked. Sous-vide cooking gets around this by cooking the meat in a water bath at the exact temperature you wish your meat to end up.  As a result, it can never overcook and stays pink from edge to edge.

Furthermore, consider a tough cut like beef chuck.  Normally, you would cook it at a higher temperature (say 190 degrees) to break down all the tough connective tissue.  Unfortunately, the tubes still contract and you are left with dry, gray meat.  Of course, chuck is full of fat so it's still delicious.  But what if you could have the best of both worlds?

It turns out that connective tissue will break down at lower temperatures, but much more slowly. Enter sous-vide. By holding the water bath at 135 degrees for 24-72 hours, the chuck becomes tender while remaining pink and juicy.  (Photographic proof below!)

Because I love meat, I've been excited about sous-vide cooking for a while now. I did some experimenting back in January 2011, but I certainly wasn't going to cough up $500 for a large countertop appliance, plus another $150 for a large vacuum sealer gadget.

A few years later, immersion circulators are just starting to become affordable for home cooks. They are smaller (you just attach them to any pot), much cheaper, and actually outperform the countertop appliances anyway.  And I discovered Ziploc vacuum bags that you pump the air out of with a small, $5 plastic vacuum pump.  What's not to love?  It was clearly time to jump aboard.


Great, let's get to the meat of it!

The very first thing I cooked was beef chuck, and it was amazing.

I sealed the meat in a vacuum ziploc and pumped out the air.  Then I put it in a water bath at 135 degrees F:


24 hours later, this emerged:


It's nothing special to look at yet.  All the magic is on the inside. Since meat doesn't really brown at 135 degrees, next we give it a quick sear on all sides:


After a couple minutes...


...the meat is transformed into this:


Now let's cut into it and see what we have:


Yep. As promised, it is pink from edge to edge.  This is beef chuck with the consistency of a good steak, and more flavor to boot.  Dinner is served!


The texture can be adjusted by varying the cooking time.  To produce a more falling-apart texture, we could increase the time to 48 (or even 72) hours.  But we really like the 24-hour chuck and have cooked it several times now.

More to come!

Friday, June 20, 2014

Xan: Assorted pics

I am dreadfully overdue for a food update.  But I am also dreadfully overdue for bed.  So here are a few pictures from months ago, to hold you over.


Pac-Man meets pulled pork:


These go very well together, maybe I'll make it into a thing.  Cornbread pork sandwiches?

Also, apples. And maple syrup and barbecue sauce, courtesy of Anne!


Actually we started eating a lot of cornbread.


Sometimes Catherine complains about chili, but I learned that she doesn't complain if there's cornbread.

*

Next up, here is Catherine's muffins with Linden's granola:


And here is a photo titled, The Lean Tower of Papa:


Incidentally, here is one titled, A Sight: Four Sore Eyes:


I don't know who comes up with these titles...

*

Next up: Adventures in sous-vide and pressure cooking!